4.3.2 Waypoint
The [Waypoint] command indicates the target position for the TCP of the robot. By configuring the waypoint, you can establish the precise location of the robot. Generally, the motion trajectory of the robot's TCP includes two or more waypoints. The [Waypoint] node enables the configuration of [FixedPos], [Variable Pos], and [Relative Pos].
1. FixedPos
The [FixedPos] feature allows you to configure the pose of the [Waypoint] by operating the page [Move] or dragging the robot.
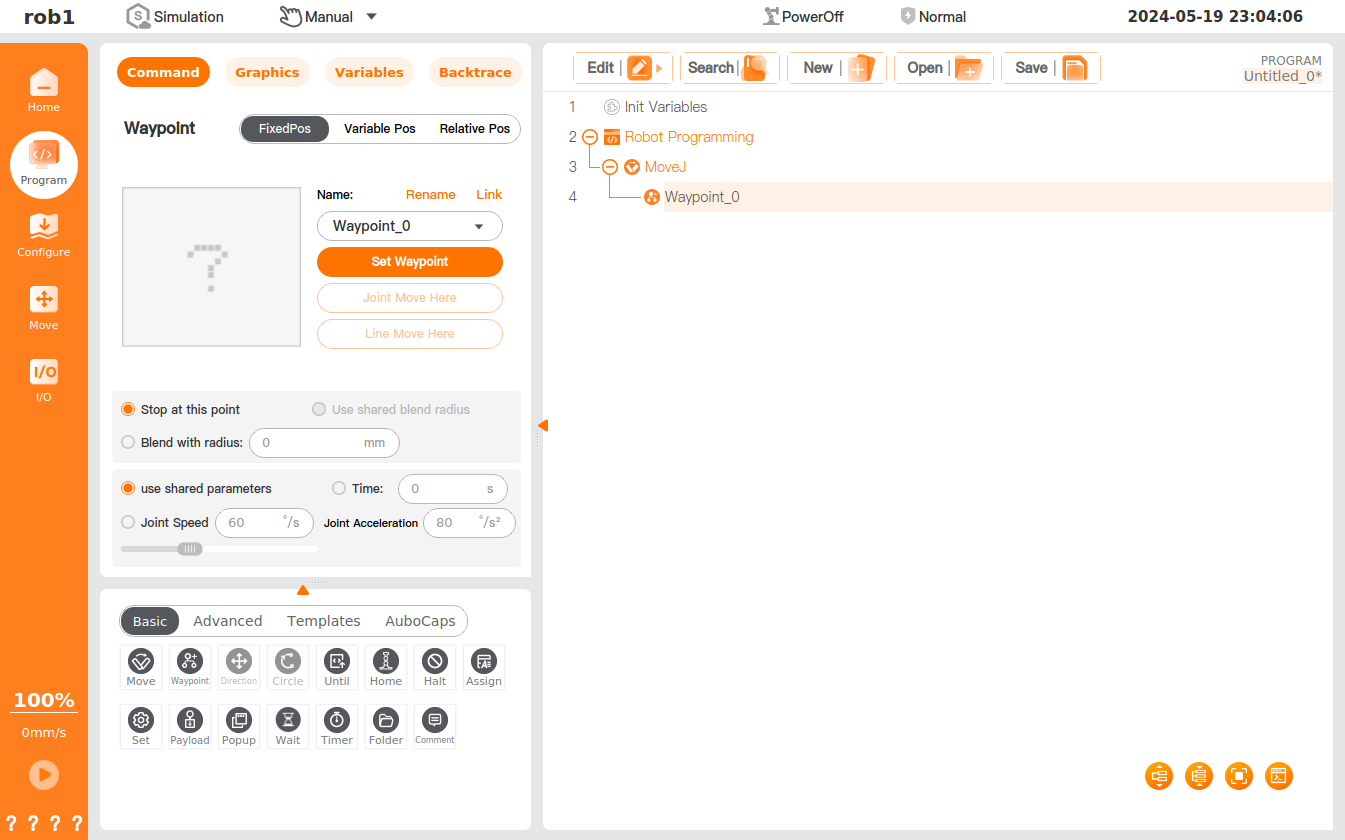
Teach: You can guide the robot to assume a specific pose in the current coordinate system. The steps to teach a waypoint to the robot are as follows:
Add a [Move] program node to the program tree.
Set TCP via the [Set TCP] drop-down menu in the [Move] program node; Select a coordinate system via the [Coordinate] drop-down menu.
Insert a [Waypoint] node under the [Move] program node. After insertion, select the waypoint type in the upper right of the [Waypoint] command interface.
Tap [Set Waypoint] in the [FixedPos] to access the robot teaching interface, where you can use the [Position/Attitude Control] to move the robot, or enter the HandGuide mode to manually guide the robot to the target waypoint. After setting, tap [OK] to save the pose of the [Waypoint].
[Waypoint] naming and switching
- A waypoint is named "waypoint_n" by default, with n starting at 0 and incrementing by 1 for each new waypoint.
- Rename waypoint: Tap [Rename] to change the waypoint name. Waypoints with duplicate names are not allowed.
- Link: Tap
 icon or [Link] and select the waypoint in the program to use the pose of the target waypoint. After successful linking, the [Link] button will change to [Unlink]. Tap [Unlink] to restore the original waypoint.
Blend parameters
- [Stop at this point]: You can set the blend radius to 0 mm to stop the robot at this waypoint position.
- Use shared blend radius: You can set the waypoint to use shared blend radius (not available in MoveJ and MoveS).
- Blend with radius: You can set the blend radius for the waypoint.
Speed
- Use shared parameters: You can set the waypoint to use shared speed parameters (joint/tool speed, joint/tool acceleration).
- Time: You can set the total movement time (in second) from the last waypoint to this waypoint, which affects the speed of the robot. An unreasonable total movement time may cause out-of-range motion parameters of the robot, which will be optimized by AUBO SCOPE, and the operating parameters of the robot shall prevail.
- Joint/tool speed, joint/tool acceleration: You can set the joint/tool speed and joint/tool acceleration of the waypoint.
2. Variable Pos
The [Variable Pos] option allows you to set the pose of [Waypoint] by configuring variables. The [Variable Pos] option is often used for bulk setting of the parameters for identical waypoints to save programming time.
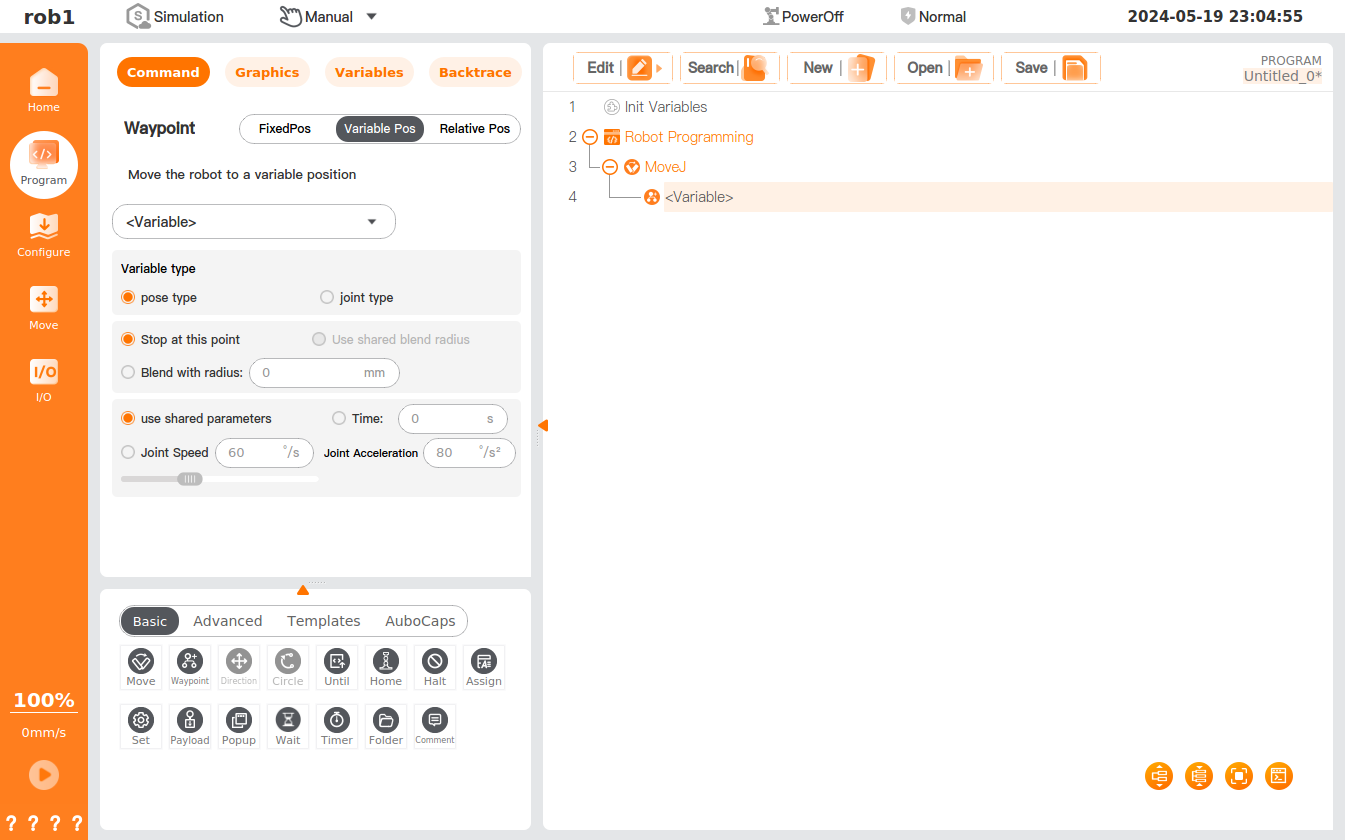
- Select variable: Tap the [\
- Variable type: You can set the type of the variable.
- Pose type: The six parameters of the variable correspond to six joint angles, which are measured in radians. Example: i_variable_1 = {0, -0.261796, 1.74532, 0.436316, 1.5708, 0}.
- Joint type: The six parameters of the variable represent the pose of the robot, measured in 'm'. Example: i_variable_1 = {0.548871, -0.1215, 0.263199, 3.14159, 0, 1.5708}.
3. Relative Pos
The [Relative Pos] feature defines the pose of the [Waypoint] by the gap between two given locations (from waypoint and to waypoint).
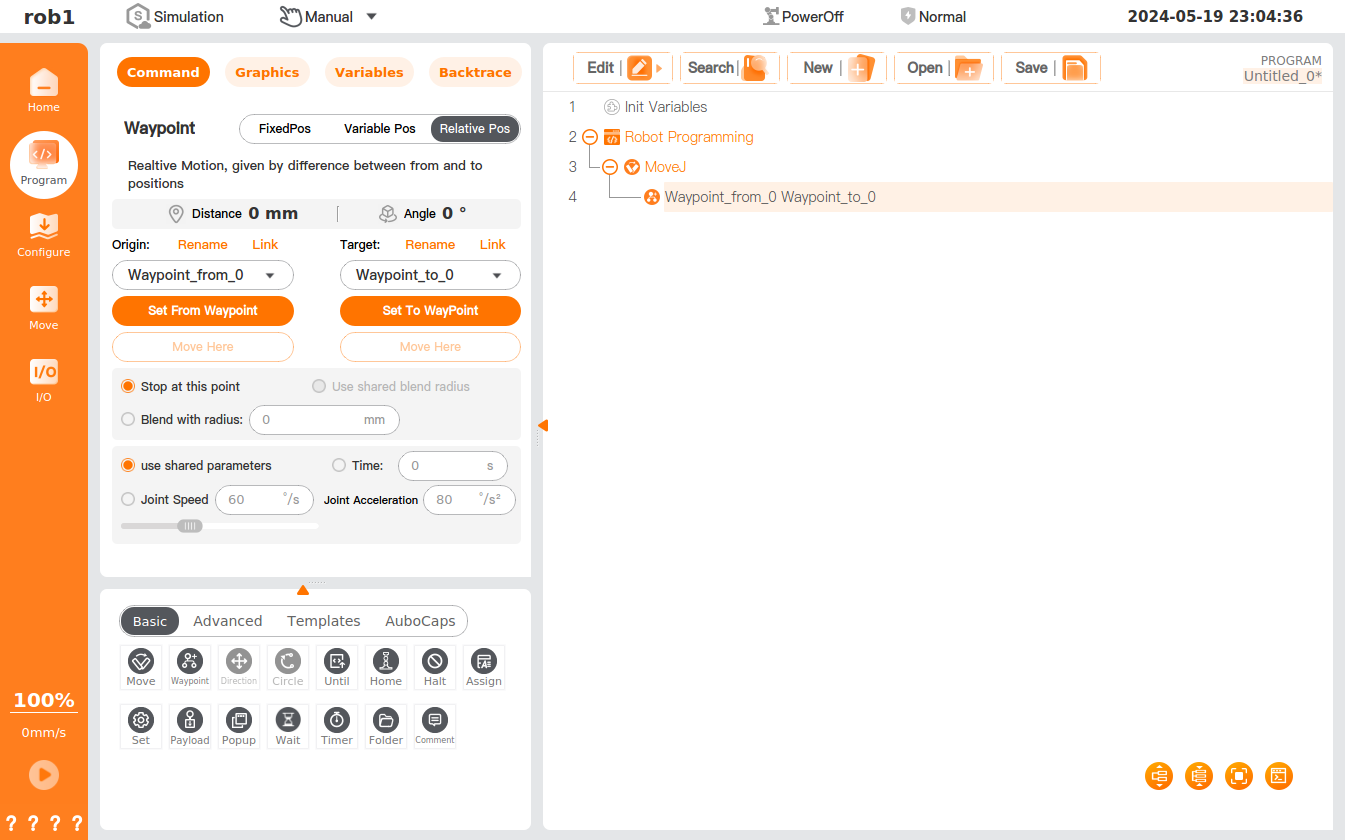
Distance: the Cartesian distance between the from and to waypoints.
Angle: the length of the rotational vector for orientation change between the from and to waypoints.
[Waypoint] rename and selection
- Tap [Rename] or the waypoint name to rename the from or to waypoint.
- Tap [Link] or icon to expand the waypoint list and select a waypoint. After successful linking, the [Link] button will change to [Unlink]. Tap [Unlink] to restore the original waypoint.
Set from and to waypoints: tap to access the robot teaching interface, where you can use the [Position/Attitude Control] to move the robot, or enter the HandGuide mode to manually guide the robot to the target waypoint. After setting, tap [OK] to save the pose of the from or to waypoint.
Move Here: tap to access the [Move] interface, where you can press and hold [Auto] to move the robot to the pose of the waypoint.