1.2 First program
A program is a set of commands that a robot can recognize and execute. A robot is programmed to achieve specific application's movement and control requirements. To program a robot in AUBO SCOPE, you can either write a program on page [Program], or write a script that calls the system functions. This section introduces the programming method through page [Program]. For application of script, see "4.5.1 Scripts".
On page [Program], a program consists of program blocks and program nodes, and the program block is composed of multiple nodes for the convenience of code management. The robot's movement path is composed of a series of waypoints, which can be set by teaching or configuration items in [Command]. You can create and write one or more programs to control the movement and also the I/O signal sending/receiving of robots, or to run commands such as "IF…ELSE… and "Loop" by setting variables.
To better understand how to write a program in AUBO SCOPE, a simple program is introduced below as an example. This program enables a robot to move back and forth between two waypoints.
On page [Program], tap [New] in the program manager tool bar to create a new program file.

Tap [Move]
 under [Basic] tab, and add [Move] node to program tree. Then tap [Waypoint]
  , and add [Waypoint] node to program tree. Now the program has a [Move] node, and two waypoints under this node, namely [Waypoint _0] and [Waypoint _1].
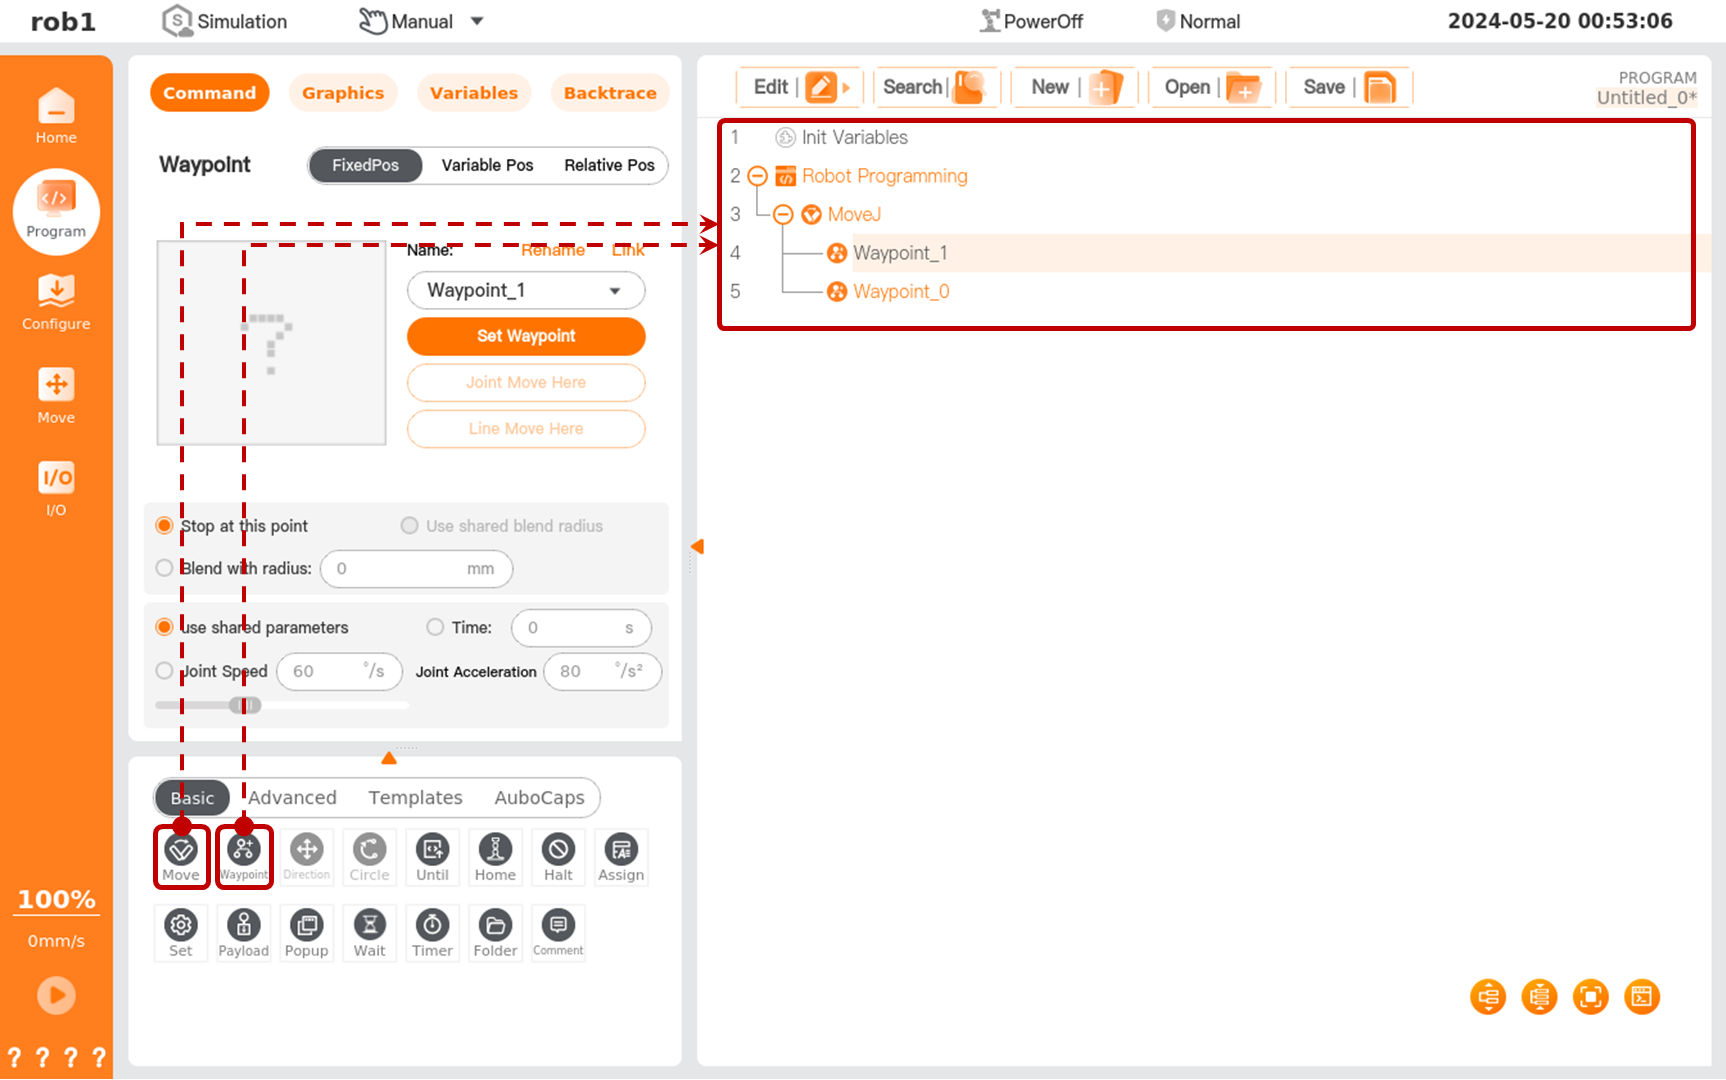
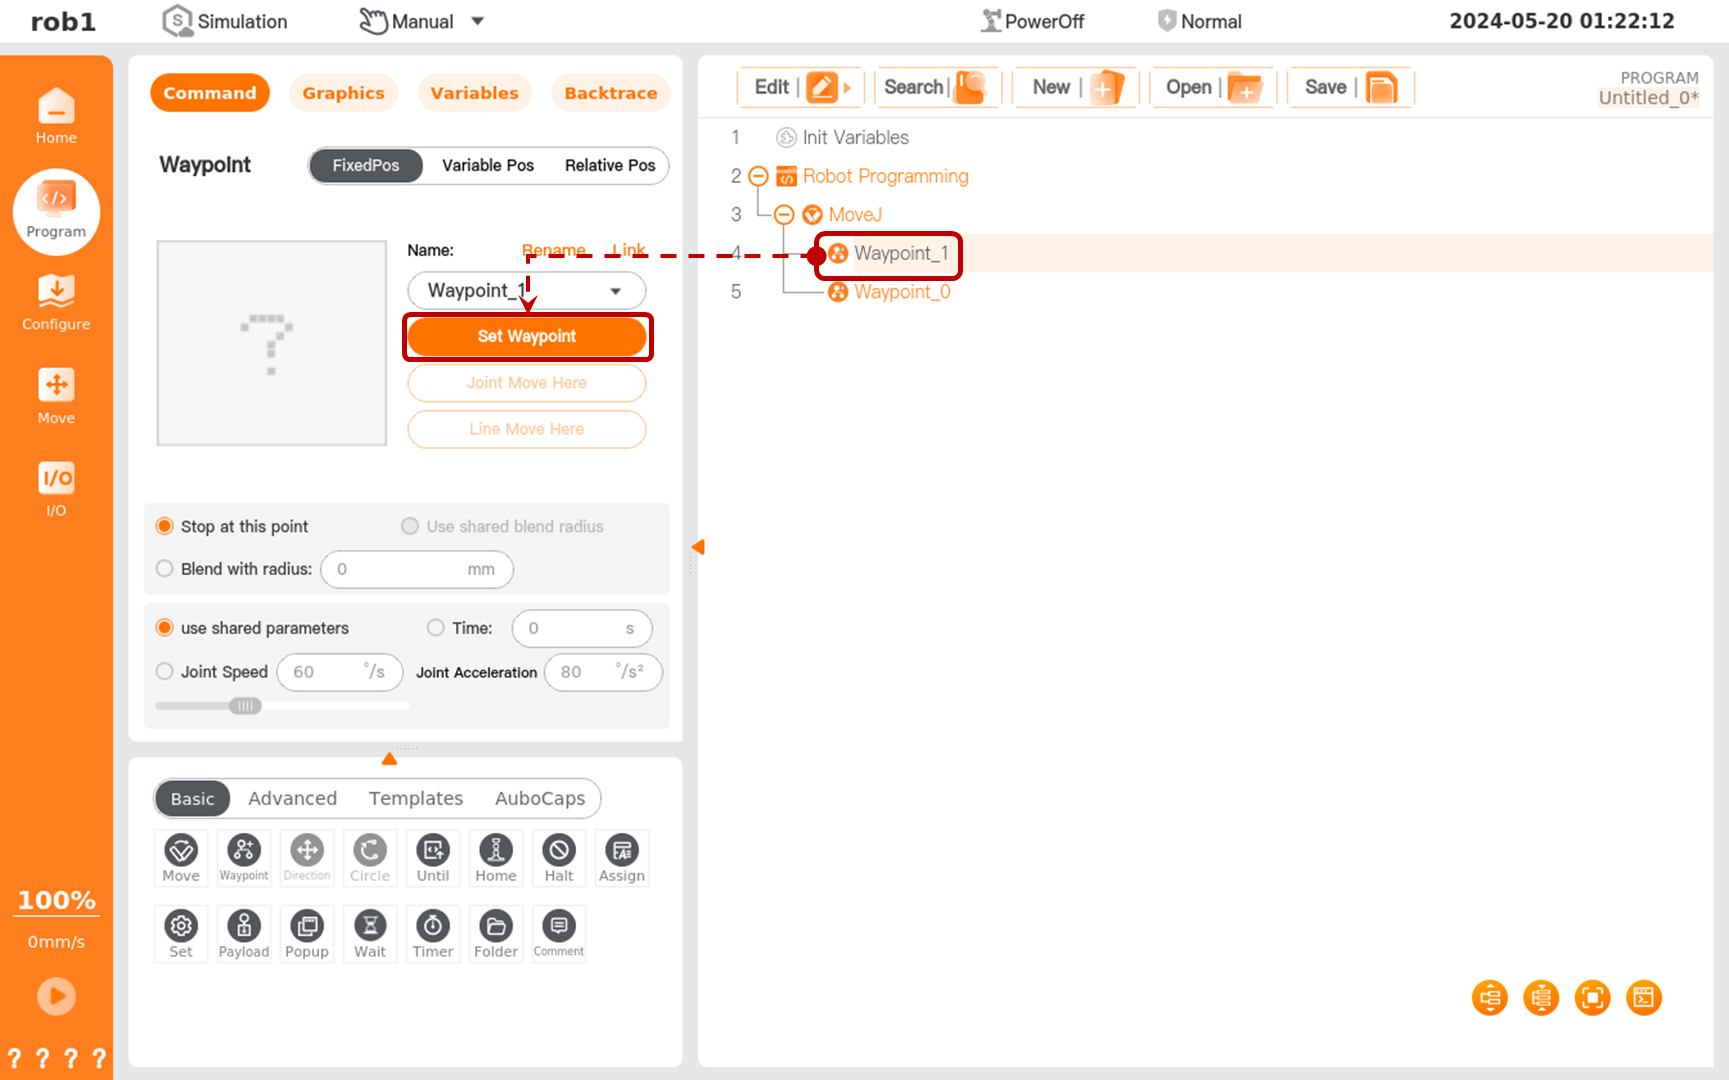
Tap [Waypoint_1]. Then, tap [Set Waypoint] under [Command] tab to enter page [Move].
Select [Basic Mode] or [Step Mode], and tap [Position/Attitude Control] to move the robot to the target position. After confirming the position, tap [OK] to exit page [Move], ending the pose settings of [Waypoint _1].
Before moving the robot, tap [Speed] on the left menu bar, and drag the [Speed Bar] slider to adjust the movement speed of the robot.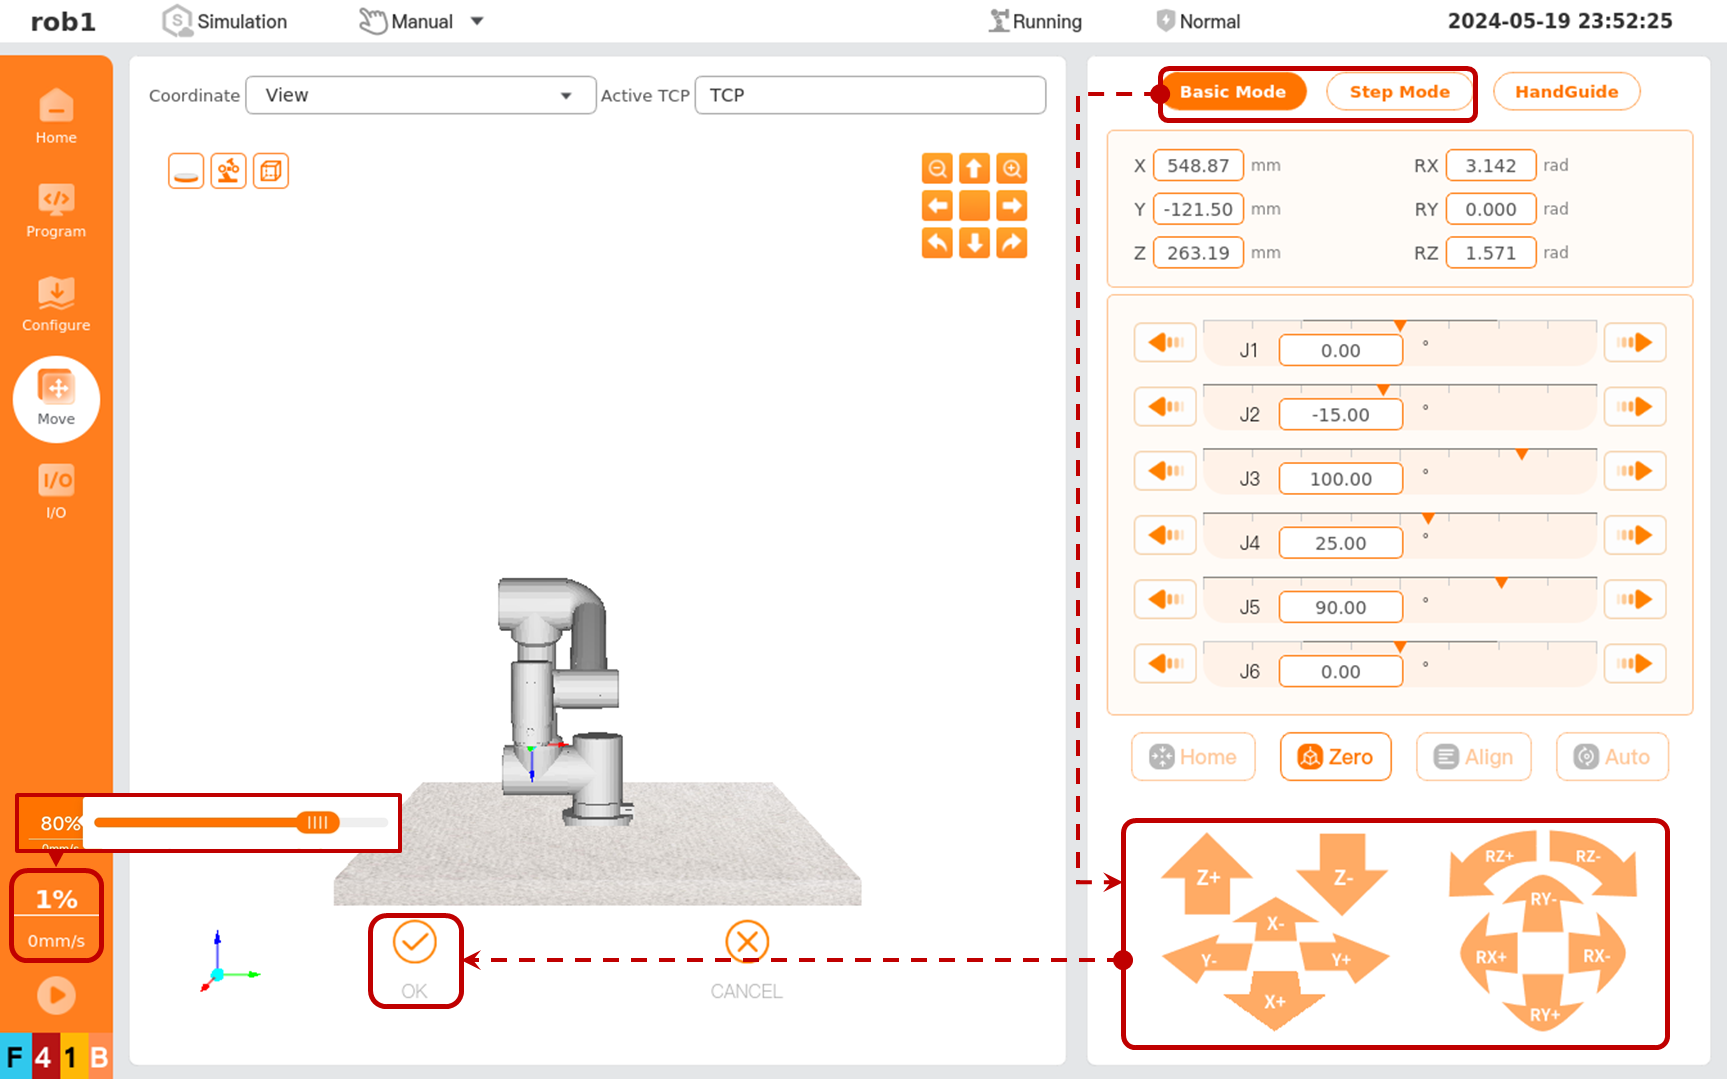
Repeat steps 3 to 4 to assign a value to [Waypoint_0].
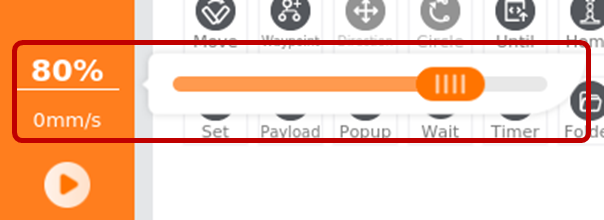
Tap [Speed] on the left menu bar to open the [Speed Bar] slider, and drag the slider to adjust the speed.
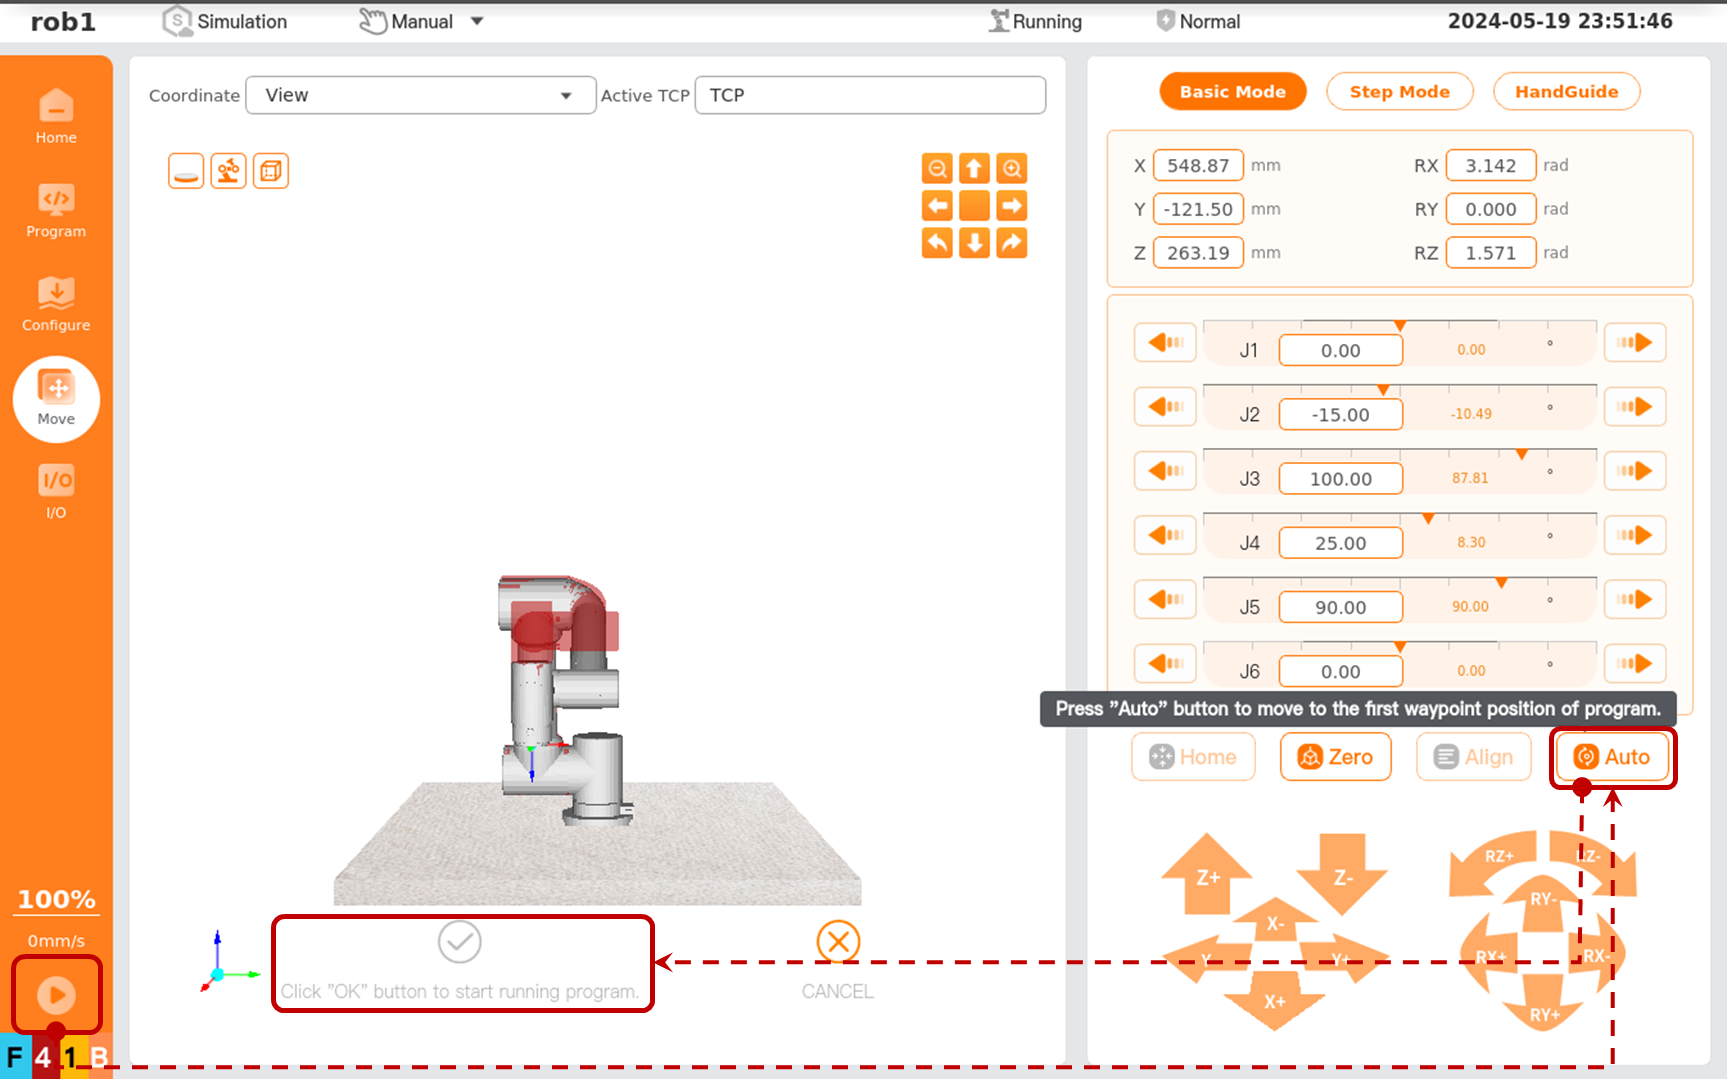
Tap [Run] on the left menu bar, select [Play from beginning] to enter page [Move], press and hold [Auto] until this button is grayed out, then the robot moves to the program’s start pose. At this time, [Click “OK” button to start running program] button is enabled. Tap this button to run the program, and then the robot moves between [Waypoint_0] and [Waypoint_1].
Congratulations! You have completed the first robot program which enables the robot to move between [Waypoint_0] and [Waypoint_1].