VNC Remote Access to the Controller
1. Linux Environment
1.1 Download VNC Viewer
A VNC client is required to remotely connect to the VNC server (if the Web version of VNC is not installed).
VNC client download: https://www.realvnc.com/en/connect/download/viewer/
The following example uses Ubuntu 16.04.7 LTS. Download the VNC-Viewer-6.22.515-Linux-x64.deb installation package.
Copy VNC-Viewer-6.22.515-Linux-x64.deb to the local virtual machine and install it.
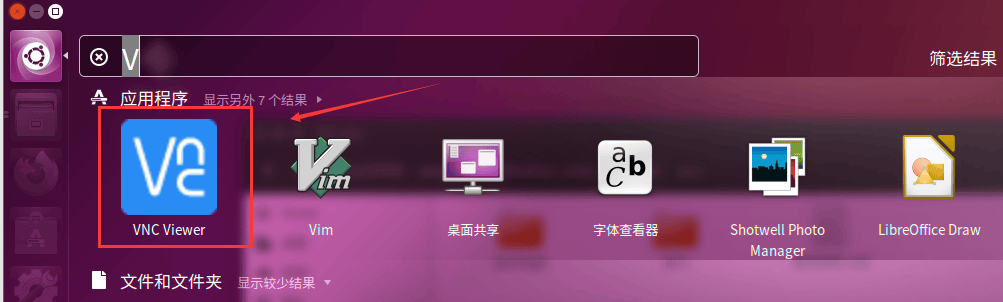
dpkg -i VNC-Viewer-6.22.515-Linux-x64.debLaunch VNC Viewer after installation. No account registration is required.
1.2 Connect to the Controller via VNC
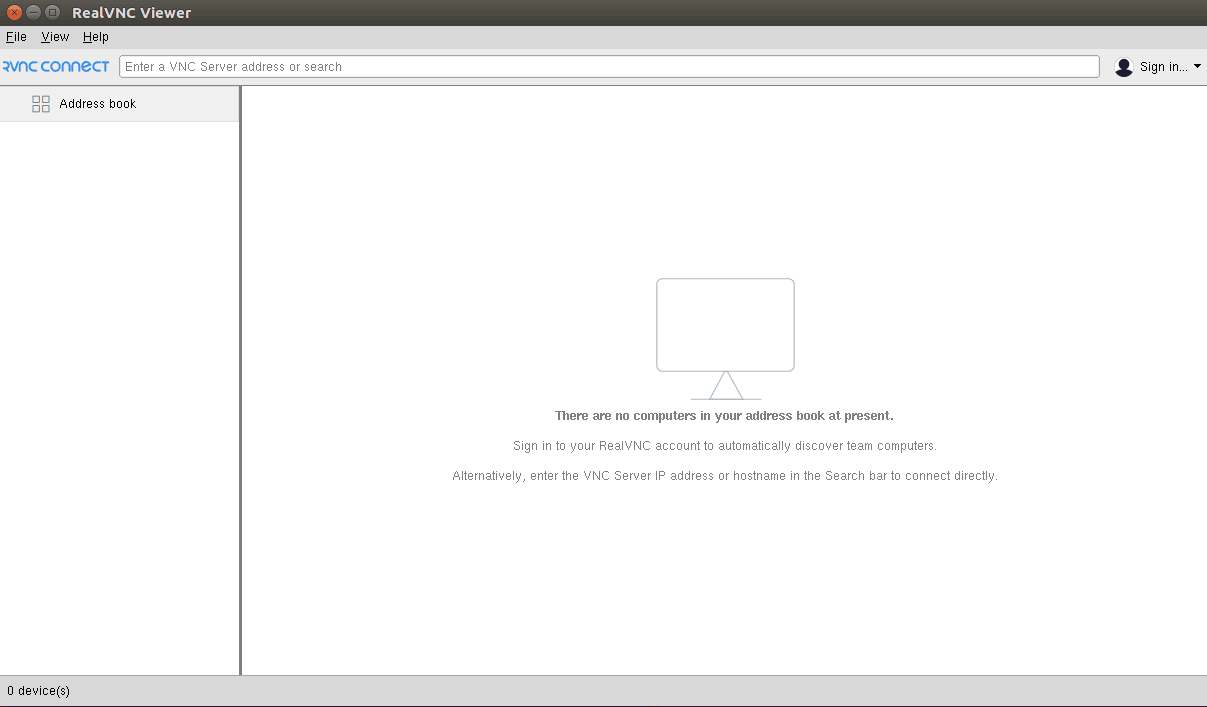
Open VNC Viewer, create a new connection, and configure it as follows:
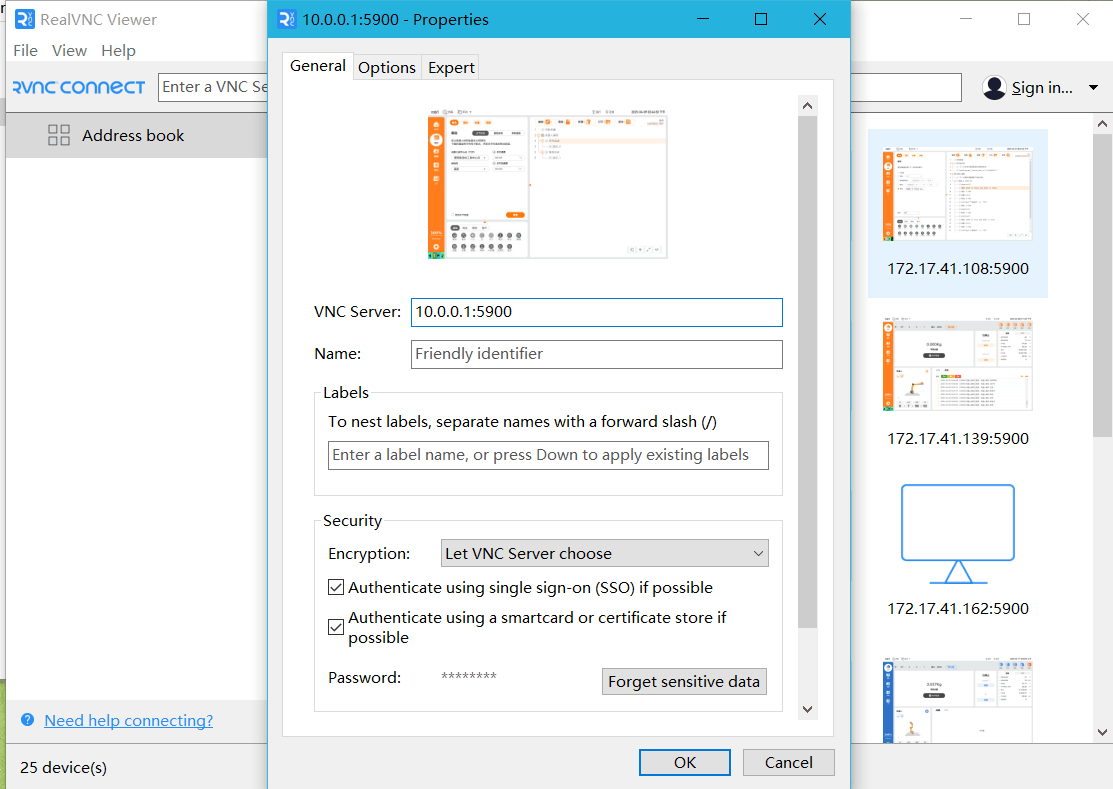
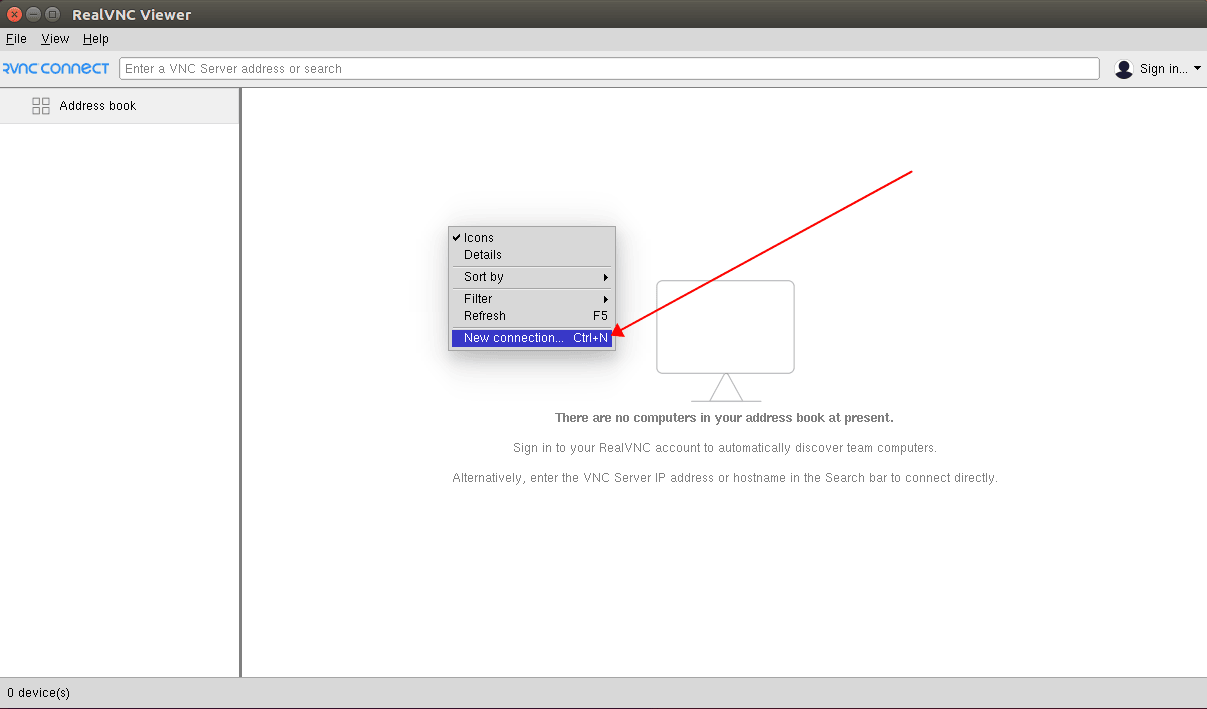
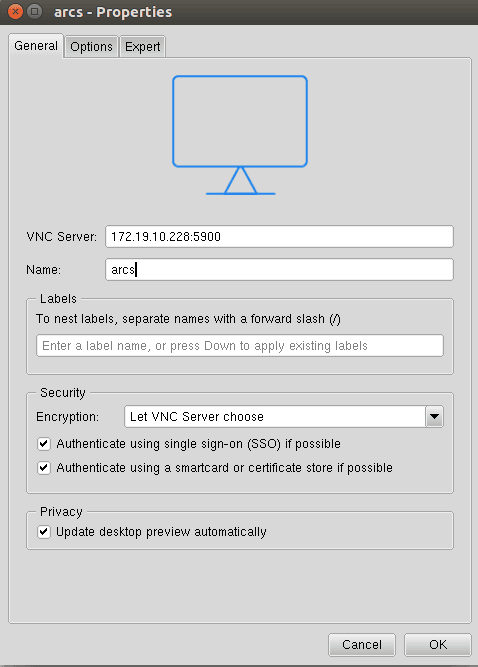
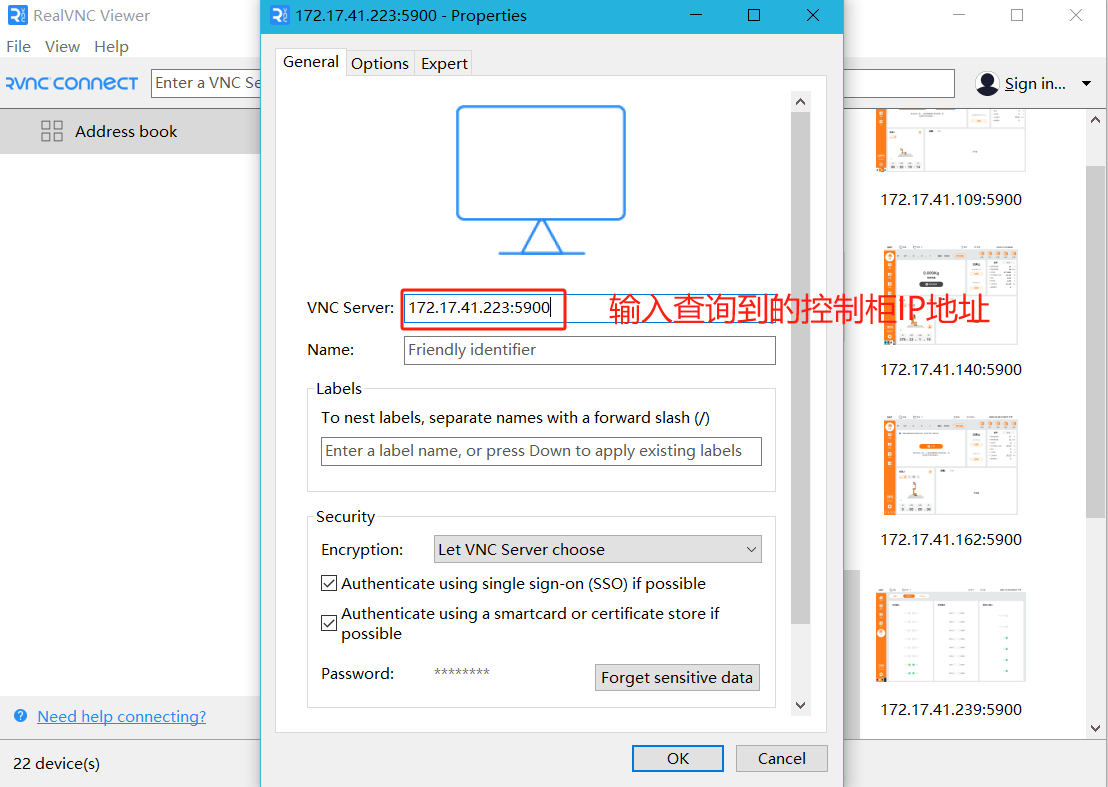
Right-click and select New connection, then enter the target device's IP address:5900. For example:
172.19.10.228:5900Set the connection name as desired.
Click OK.
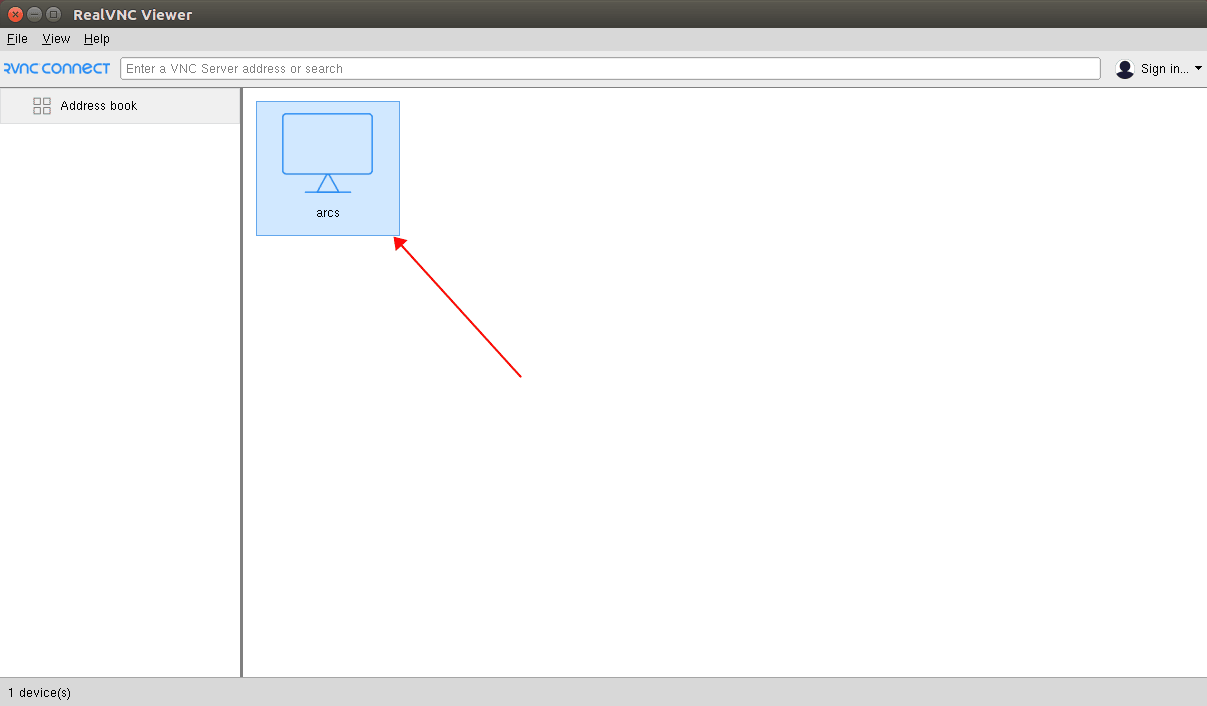
Double-click the target device.
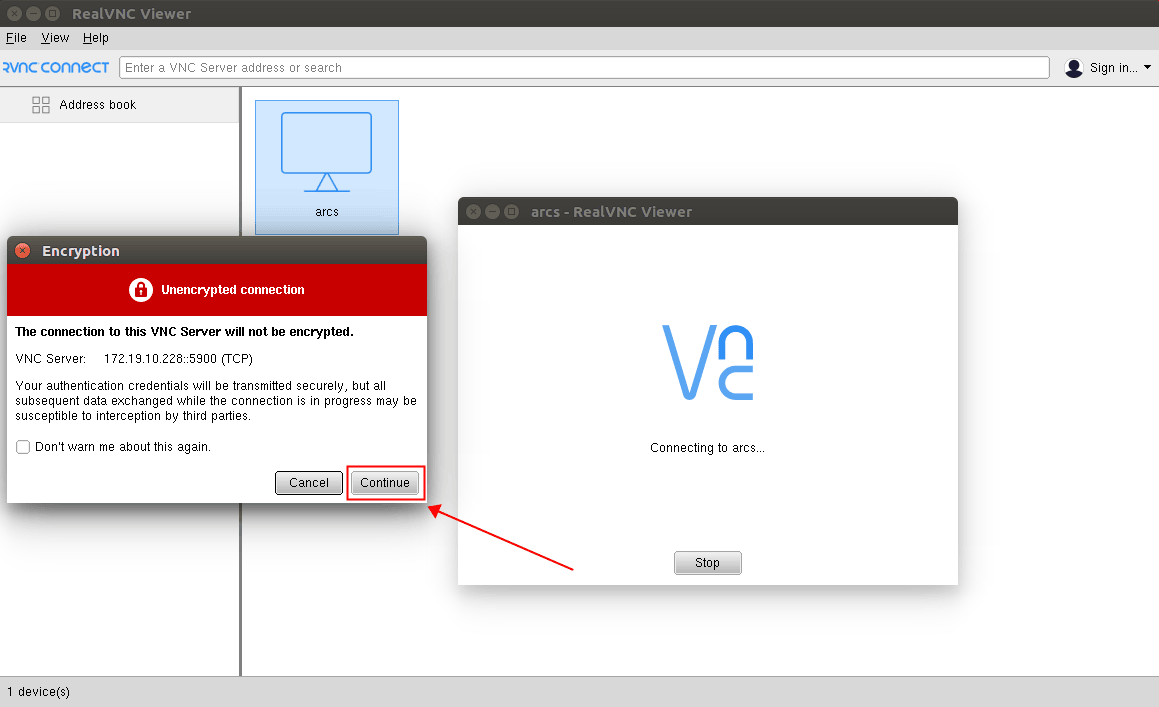
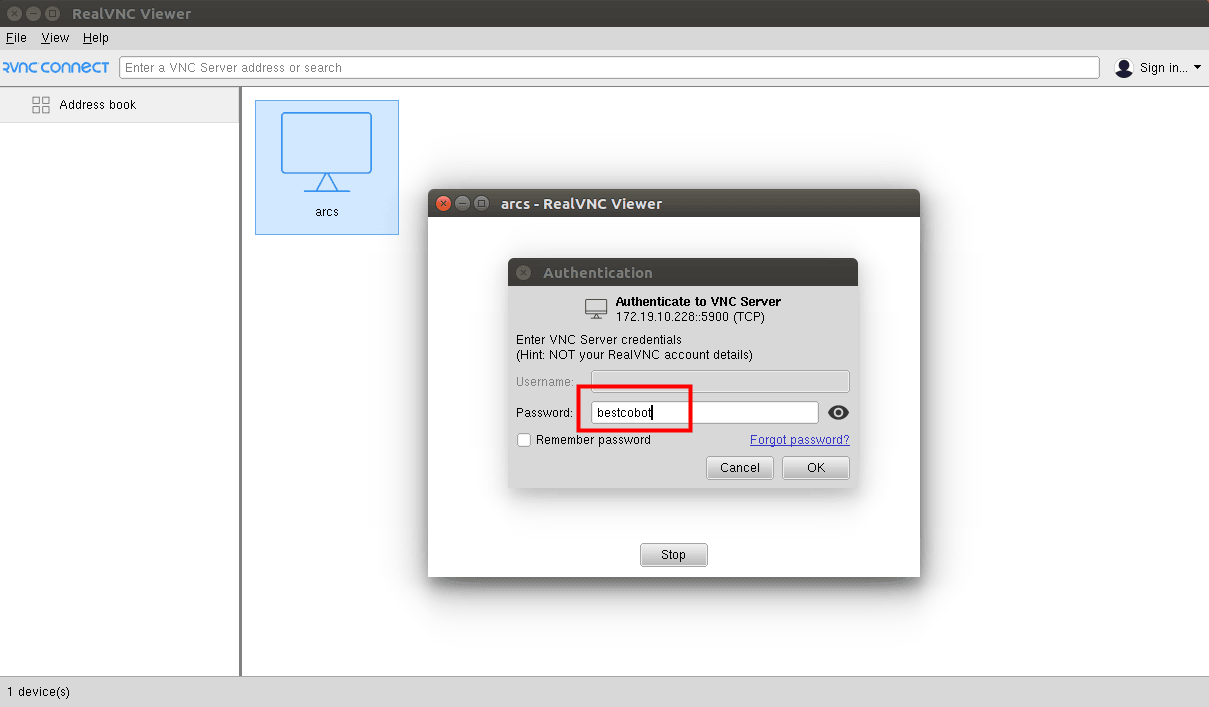
Enter the password: bestcobot.
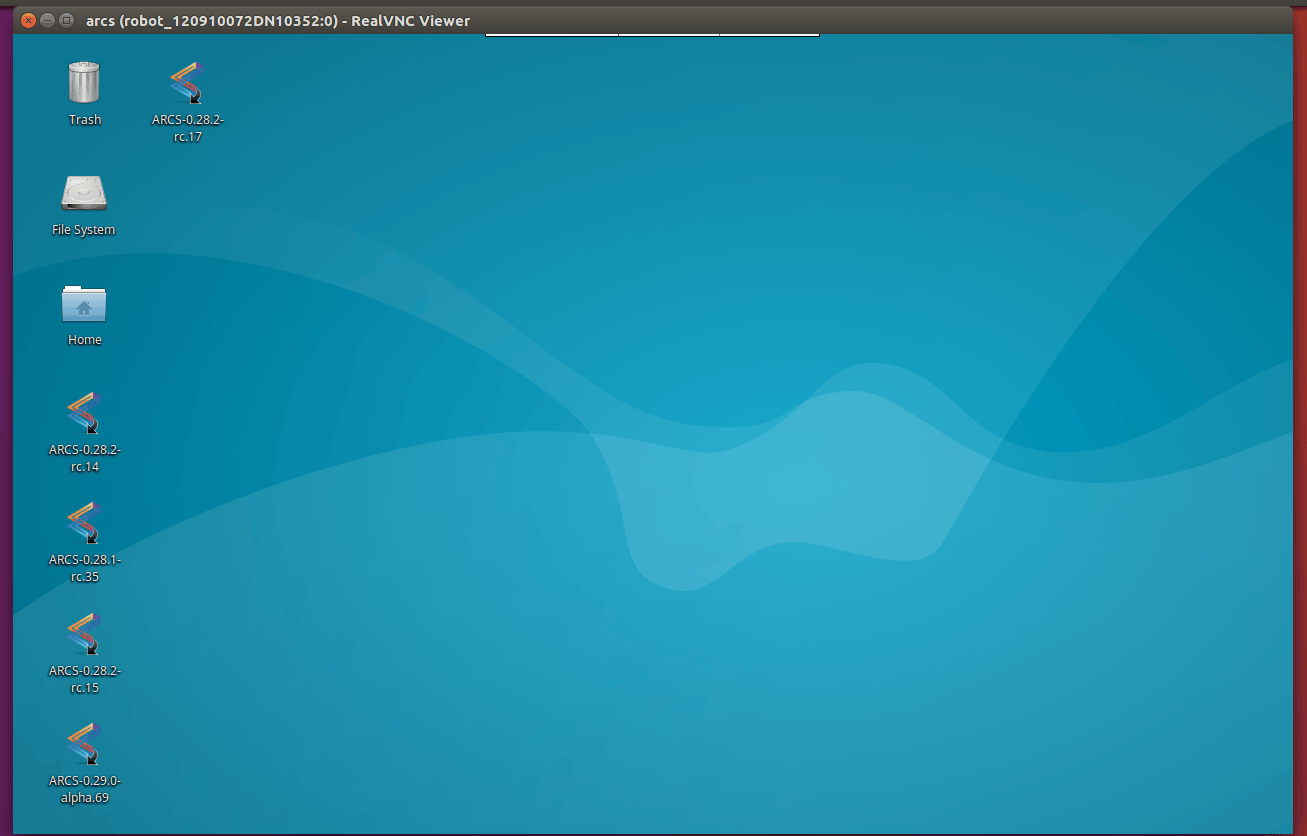
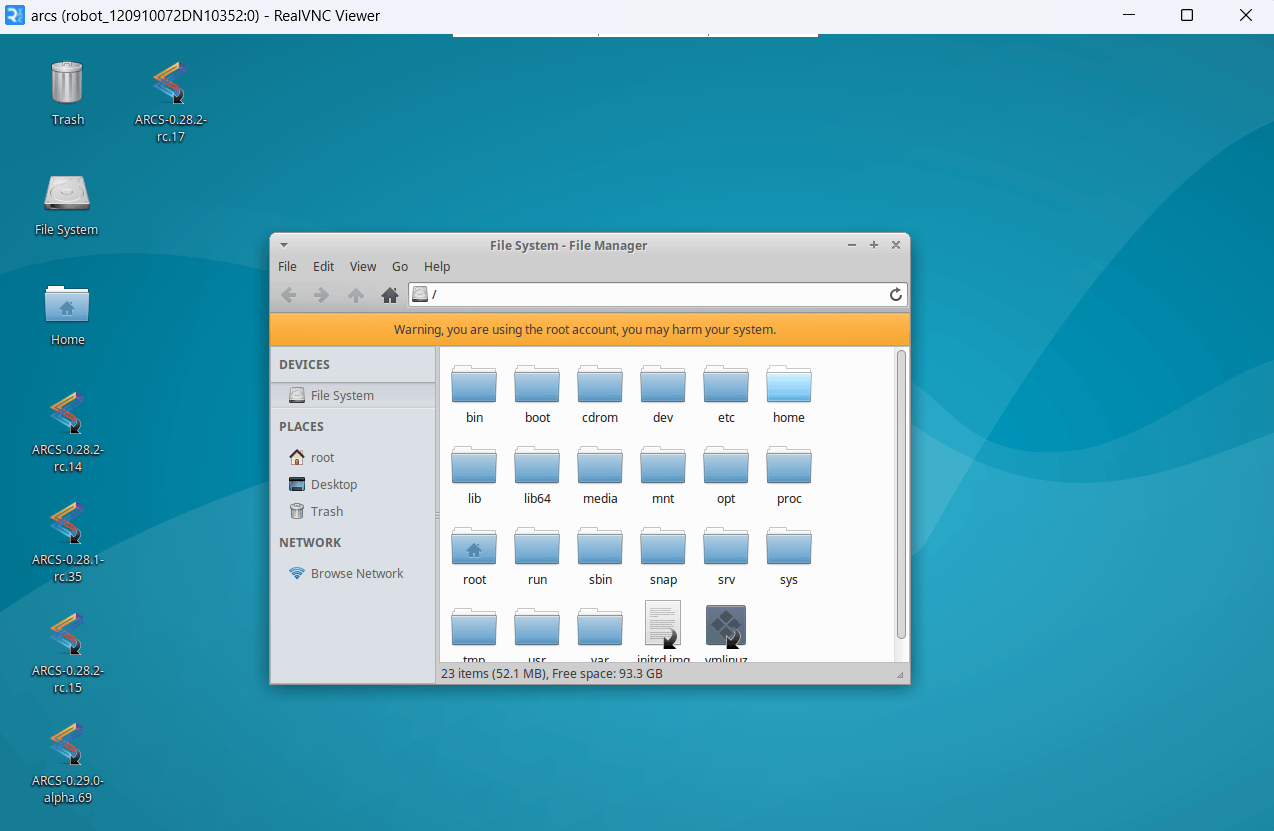
The VNC remote-control connection is now complete.
2. Windows Environment
2.1 Download VNC Viewer
A VNC client is required in Windows environments to remotely connect to the controller's VNC server.
This guide uses Windows 10 as an example. Download the VNC Viewer installer provided by AUBO using the following link:
Download VNC Viewer 7.13.1 for Windows
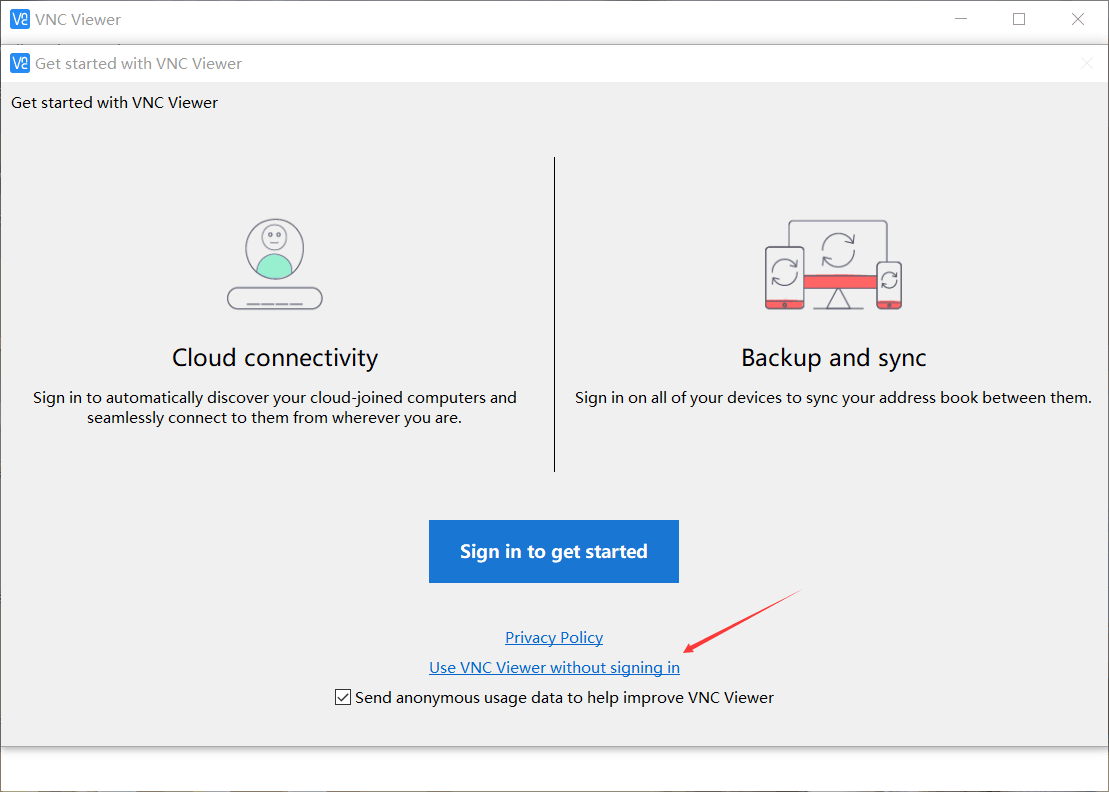
After the download is complete, double-click the installer to install VNC Viewer. Once installed, launch the application without registering an account.
2.2 Local Remote Control via VNC
Open the VNC Viewer software, create a new connection, and configure it as follows:
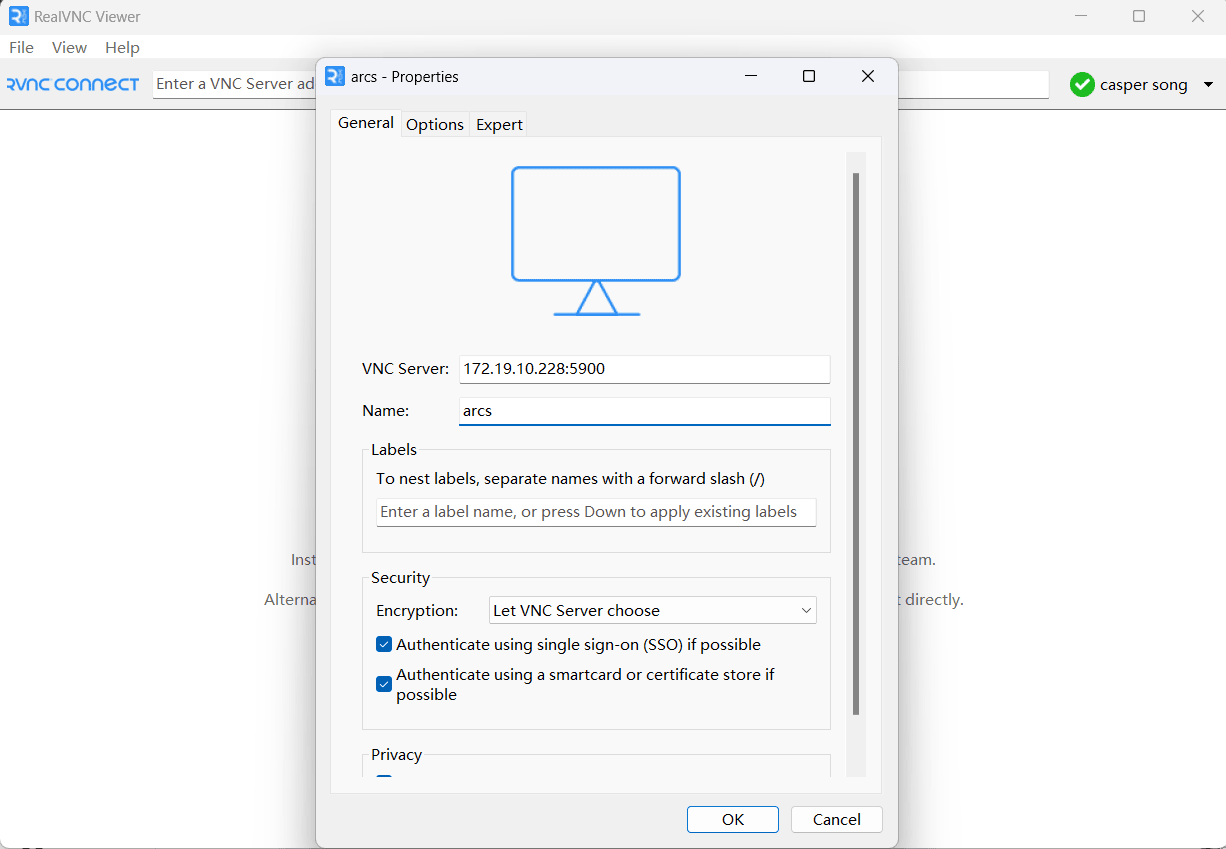
Right-click and select New connection, then enter the target device's IP address:5900. For example:
172.19.10.228:5900Set the connection name as desired.
Click OK.
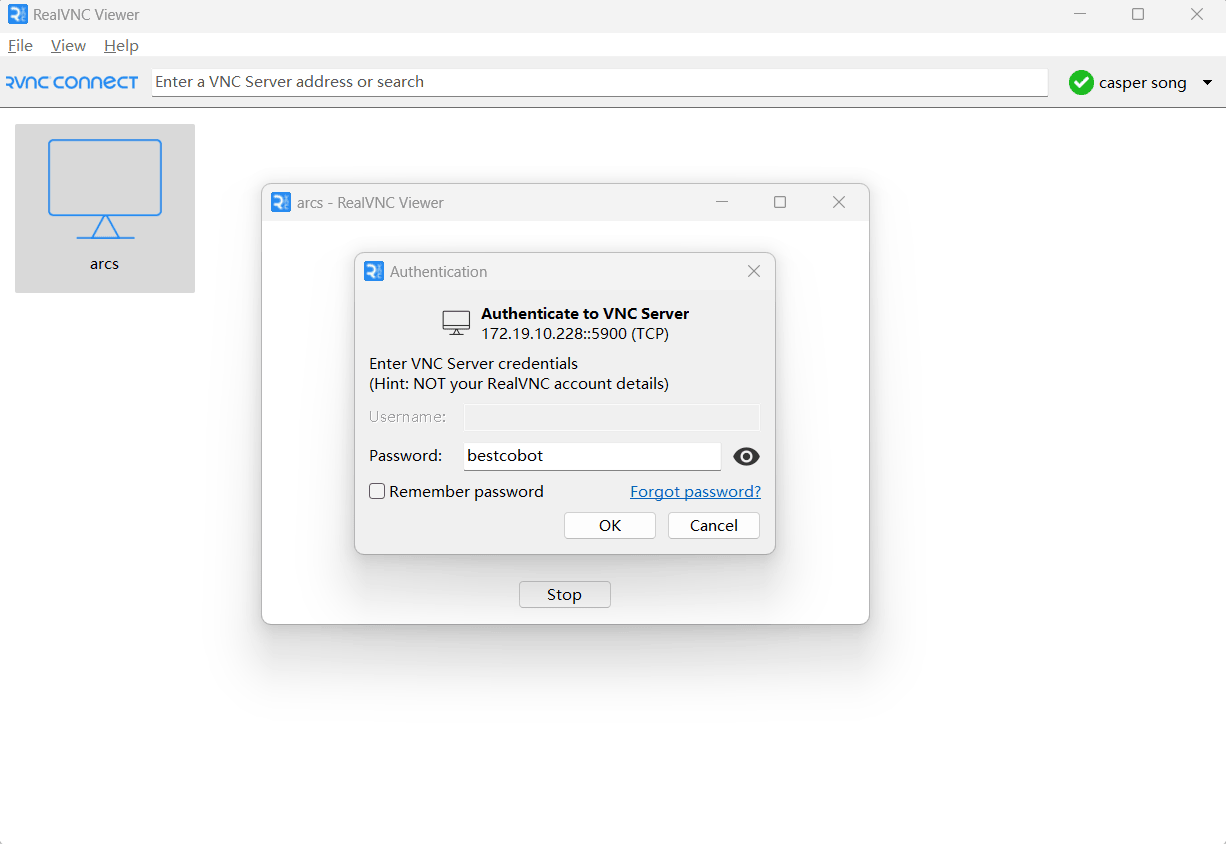
Double-click the target device.
Enter the password: bestcobot.
The VNC remote-control connection is now complete.
3. Frequently Asked Questions
3.1 VNC Performance Issues When No Teach Pendant or External Monitor Is Connected
3.1.1 Hardware Solution
Cause: When no external monitor is connected, the X server does not start with the appropriate resolution and refresh rate.
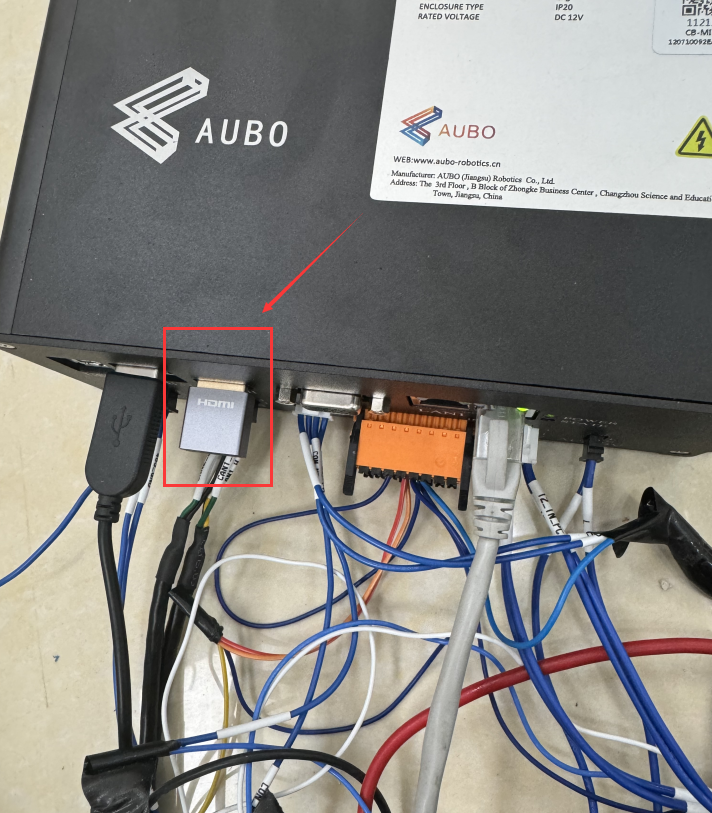
Solution: Connect an HDMI display emulator (dummy plug) to the controller cabinet and configure the system's default display resolution.
Recommended HDMI display emulator: ULT-unite DP/HDMI Display Emulator (https://detail.tmall.com/item.htm?abbucket=20&id=733226743007&ns=1&priceTId=2147829417175989219046173e5a87&skuId=5246185967834&spm=a21n57.1.item.4.6a0f523cqYwqWk)
Procedure:
- Plug the HDMI display emulator into the controller cabinet, then restart the controller cabinet.
- After connecting to the device remotely via VNC, run the following command in the terminal to check the current monitor name. In the example below, the monitor name is
HDMI-3.
export DISPLAY=:0
xrandr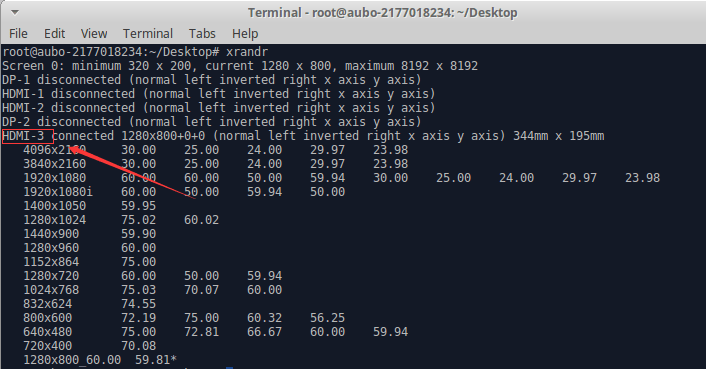
- Set the default monitor resolution to 1280x800.
Open the /etc/profile file.
Add the following content to the end of the file (the monitor name HDMI-3 is used here as an example):
xrandr --newmode "1280x800_60.00" 83.50 1280 1352 1480 1680 800 803 809 831 -hsync +vsync
xrandr --addmode HDMI-3 1280x800_60.00
xrandr --output HDMI-3 --mode 1280x800_60.00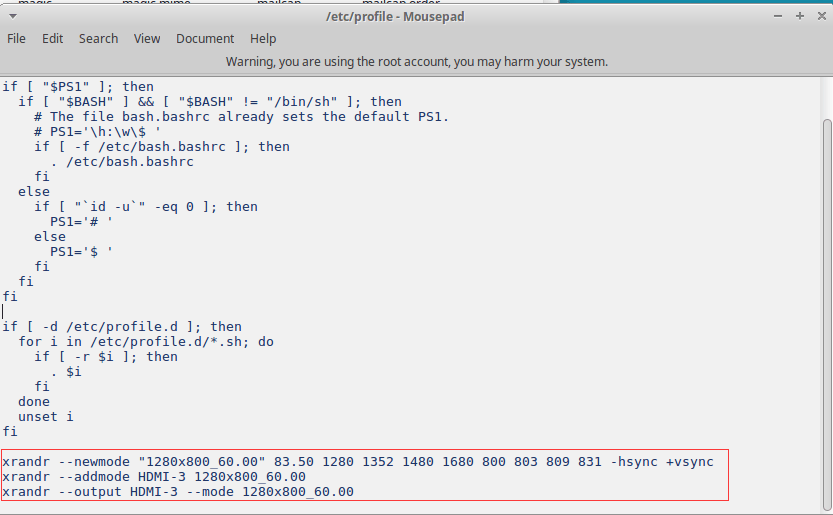
Save and close the /etc/profile file. Run the following command to apply the changes manually:
source /etc/profile3.1.2 Software Solution
Solution: Create a virtual display.
Risk: After installing the virtual display, this operation cannot be undone. After the device is restarted, connecting an external monitor to the original device will no longer display the desktop interface, and the system will instead enter terminal mode.
Procedure:
- Install the
xserver-xorg-video-dummydriver.
sudo apt update
sudo apt install xorg-video-abi-20 xserver-xorg-core
sudo apt install xserver-xorg-video-dummy- Configure the virtual display.
Create or edit the /etc/X11/xorg.conf file, and add the following content:
Section "Device"
    Identifier  "Configured Video Device"
    Driver      "dummy"
EndSection

Section "Monitor"
    Identifier  "Configured Monitor"
    HorizSync    31.5-48.5
    VertRefresh  50-70
EndSection

Section "Screen"
    Identifier "Default Screen"
    Monitor    "Configured Monitor"
    Device     "Configured Video Device"
    DefaultDepth 24
    SubSection "Display"
        Depth 24
        Modes "1920x1080"
    EndSubSection
EndSection- Restart the device.
4. Application Example: Using VNC for Teaching on the New C Controller Cabinet
4.1 Method 1: Connect an External Monitor to Obtain the IP Address, Then Connect via VNC
Connect an external monitor using an HDMI cable. The device can then be operated using a mouse.
For detailed instructions on connecting an external monitor, refer to 38 Controller External Monitor Operation Guide.
To use VNC for remote teaching, connect the laptop and the controller cabinet to the same local area network (LAN).
Connect the controller cabinet to the router using a wired network connection, and connect the laptop to the router's Wi-Fi. Then, using the external monitor, access the software interface and navigate to
Home > Settings > System > Networkto view the dynamically assigned IP address of the new C controller.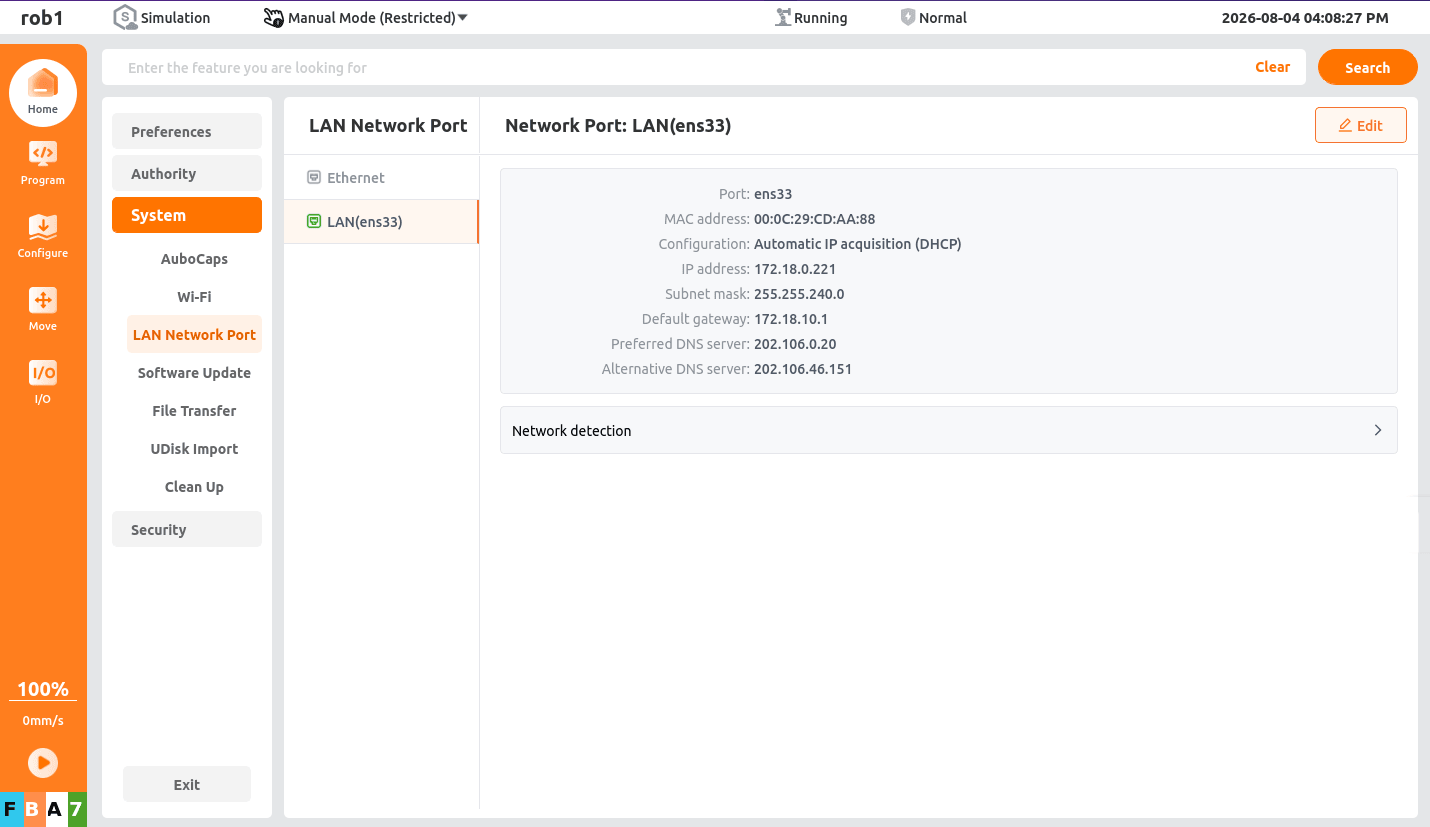
After obtaining the controller cabinet's IP address, use VNC to connect to the controller remotely.
4.2 Method 2: Connect to the Controller Cabinet's Built-in Wi-Fi Hotspot to Obtain the IP Address, Then Connect via VNC
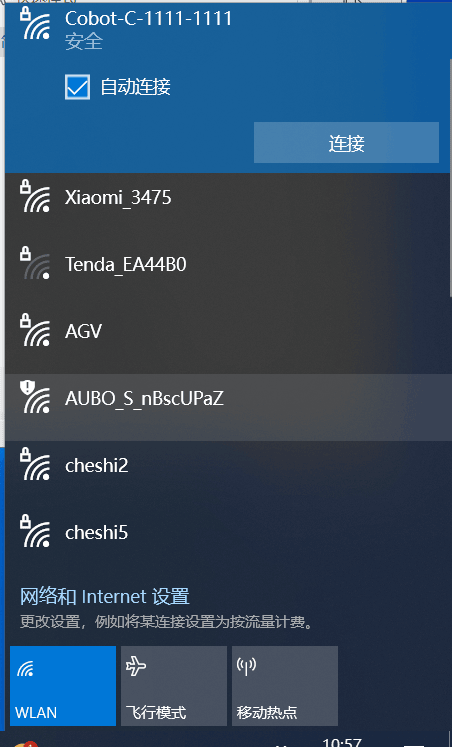
Connect the laptop to the controller cabinet's built-in Wi-Fi hotspot (default password: 12345678).
View the IP address of the built-in Wi-Fi hotspot.
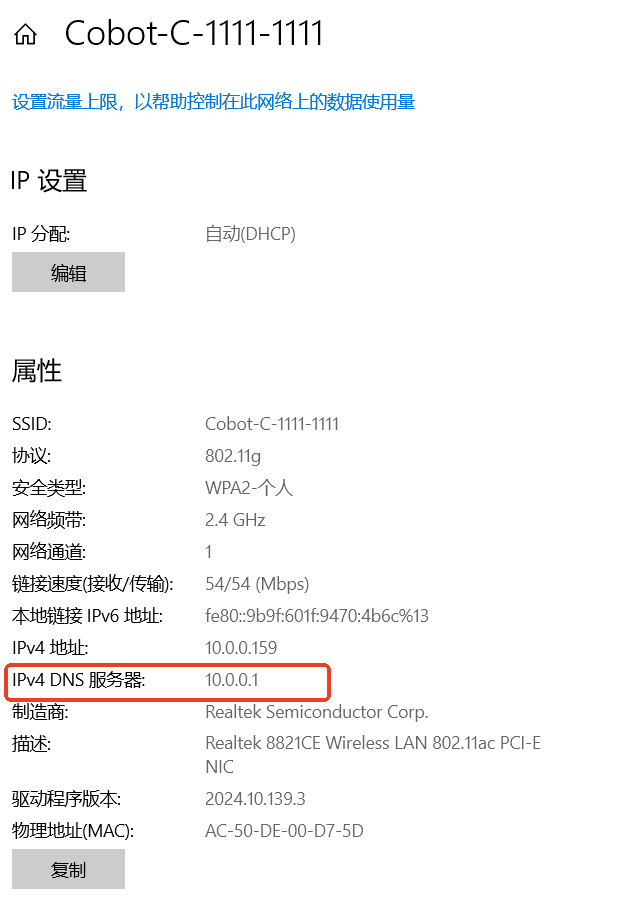
After obtaining the IP address, add a connection in the VNC client, enter the IP address, and connect to the robot arm.